TestComplete GUI extensibility with Object Mapping
What’s it about?
When TestComplete encounters an object in GUI hierarchy of an application, it tries to recognize it by internal class name: is it an input box, list, button, or data grid. These class names are predefined and come with the product – TestComplete, and/or one of its add-on libraries. Off course, new object classes appear every day, but all of them inherit their behavior, methods and properties from the base classes, known and recognizable by TestComplete. But you don’t have to ask or wait for a patch. You can “teach” (configure manually or through special wizard) TestComplete how to recognize and map a new object under its base class.
How to configure
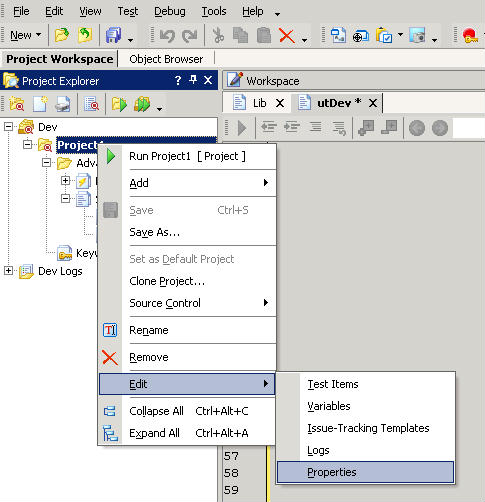
Open your automation project in Project Explorer.
Right-click on it to bring up context menu and select “Edit/Properties”.

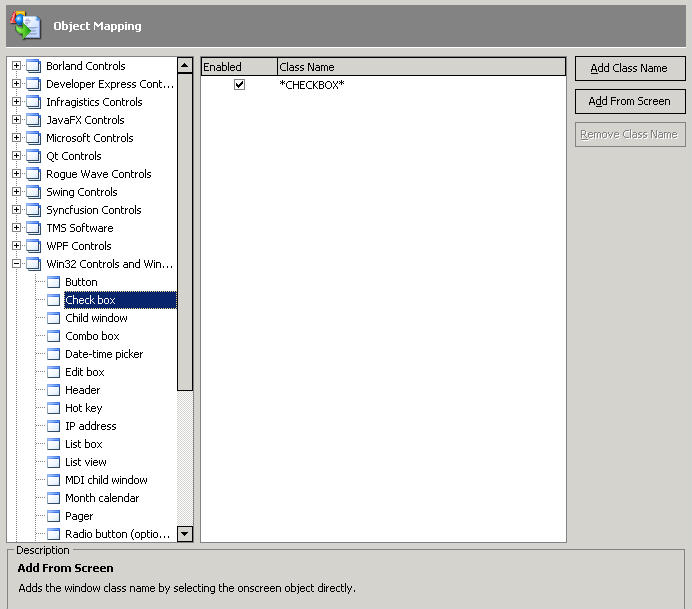
In the Project Properties Workspace appeared select “Object Mapping” tab.
The following narrative comes from AutomatedQA TestComplete documentation.
The settings include two lists: the left-hand one displays object types grouped by categories; the right-hand one displays class names assigned to the selected type. To add a new class name association, select the control’s type in the list on the left, click Add Class Name and enter the desired class name. You can also press the Add From Screen button and use the subsequent Add New Object Class dialog to choose the control whose class name you would like to map.
You can use wildcards (* and ?) in class names. The asterisk (*) corresponds to the string of any length, the question mark (?) – to any single character. In addition, class names are case-insensitive.
Bring up your application under test, open screen with the control that is not currently recognizable, and switch back to TestComplete.
Click “Add From Screen”, and select the control to capture it.


